Bootstrap Components
This documentation is to help you regarding each step of customization. Please go through the documentation carefully to understand how this template is made and how to edit this properly. Basic HTML and CSS knowledge is required to customize this template. You may learn basics here (Html,CSS and Javascript).
For questions on basic HTML, Javascript or CSS editing - please give your question a quick Google or visit W3Schools as template issues get top priority.
Get started with Bootstrap 4 (v4.5.3), the world's most popular framework for building responsive, mobile-first sites template starter page.
Read more about the used technologyBootstrap: Bootstrap v4.5.3
HTML5/CSS3: W3schools
HTML5: html5doctor
Bootstrap has a wonderfull documentation on following components:
- Introduction
- Overview
- Content
- Grid system
- Typography
- Images
- Alerts
- Badges
- Carousel
- Tables
- Buttons
- Utilities
Requirements
You will need the following softwares to customize this template.
- Code Editing Software (eg: Dreamweaver, Sublime Text or Notepad)
- Web Browser for testing (eg: Google Chrome, Mozilla Firefox and Internet Explorer etc...)
- FTP Tool to upload files to Server (eg: FileZilla)
Basic Installation
Steps to be follow for getting started with the template:
- Open ... /Template Folder to find all the Templates Files
- You'll have to upload these file using a FTP on your server
-
Make sure you maintain the structure while uploading the required files/folders:
- assets/css - Stylesheets Folder
- assets/fonts - Fonts Folder
- assets/images - Images Folder
- assets/js - Javacripts Folder
- assets/php - Contact Form PHP Folder
- assets/videos - Videos Folder
- /index.html - Index File/Homepage
- You're now good to go..! Start adding your content/images and generate your beautiful brand new website for your awesome users.
- Now that you have followed these steps your basic installation is complete and ready to flaunt your site to the world.
HTML Structure
Here is the general HTML structure of the template:
<!DOCTYPE html>
<html class="no-js" lang="en">
<head>
  [Meta Tag, Title, Favicon, CSS etc...]
</head>

<body>
<!-- Preloader -->
<div id="preloader" class="preloader active"></div>
<!-- End Preloader -->

<!-- Wrapper -->
<div class="page-wrapper">
    <!-- Header Section -->
    <header class="site-header">
	[Section Content]
    </header>
    <!-- End Header Section -->

    <!-- Main Wrapper -->
    <main class="main-wrapper">
        <!-- Section -->
        <div class="section">
            [Section Content]
        </div >
        <!-- End Section -->
    </main >
    <!-- End Main Wrapper -->

    <!-- Footer Section -->
    <footer class="footer">
	[Footer Content]
    </footer>
    <!-- End Footer Section -->

    <!-- Back To Top -->
    <div id="back-to-top">
	[Back to top Arrow ]
    </div>
    <!-- End Scroll Top -->
</div>
<!-- End Wrapper -->

<script> [Script Here] </script>

</body>
</html>
CSS Files
Here is the general CSS structure of the template:
<!-- Plugins CSS [Included Files Bootstrap, Font Awesome, Animate etc...] -->
<link rel="stylesheet" href="assets/css/plugins.css">

<!-- Styles CSS -->
<link rel="stylesheet" href="assets/css/style.css" />
<link rel="stylesheet" href="assets/css/responsive.css" />

<!-- Template Color -->
<link rel="stylesheet" href="assets/css/colors/default.css" />
Javascript Files
Here is the general Javascript structure of the template:
<!-- Plugins JS [Included Files Jquery, Bootstrap etc...] -->
<script src="assets/js/plugins.js"></script>

<!-- Main JS -->
<script src="assets/js/main.js"></script>

<!-- Switcher JS -->
<script src="assets/js/switcher.js"></script>
Favicon icon
Favicon is an icon associated with the URL that is displayed at various places, such as in a browser’s address bar or next to the site name in a bookmark list.
You can add a Favicon to your Website using the following code:
<!-- Favicon -->
<link rel="shortcut icon" href="assets/images/fevicon.png"/>
Page Loader
Page Loading Transitions are enabled by default. If you wish to disable the page loading transition you can simply delete below section
<!-- Preloader -->
<div id="preloader" class="preloader active">
<!-- End Preloader -->
Logo
The Logo Container can be found in the Header Container - header. Replace Text base Name logo logo Name and Image logo "logo.png" with your own logo image URL.
<!-- Logo Text -->
<div class="logo navbar-brand p-0 m-0 w-100">
    <a href="index.html" class="text-logo"> Logo Name </a>
</div>
<!-- End Logo Text -->

<!-- Logo Image -->
<div class="navbar-brand logo mx-auto p-0 text-center">
    <a href="index.html" class="logo-img"><img class="img-fluid" src="assets/images/logo.png" alt="logo" title="Logo" /></a>
</div>
<!-- End Logo Image -->
Changing Fonts
You can add/change the site font, from all fonts used from Google Web Font Services, with the one that suits you the best. You can find the font link in top of the style.css in all HTML file. See example below:
To include new font you can simply add another link like this:
<-- Google Fonts -->
<!-- Roboto font -->
@import url('//fonts.googleapis.com/css?family=Roboto:100,300,400,500,700,900&display=swap');

<!-- Montserrat font -->
@import url('//fonts.googleapis.com/css2?family=Montserrat:wght@100;200;300;400;500;600;700;800;900&display=swap');
In order to change the fonts, you will need to edit the above links with your custom font, You can easily use Google Web Font Services if you plan to use a Google Font or remove it completely. If you plan to use a self hosted font, here is an Example of using Self Hosted Fonts
Section Title
Use this sample code for page section title to keep the consistency in the title.
<div class="section-title clearfix">
    <h1>Heading</h1>
    <p class="section-subtitle">Description</p>
</div>
Section padding
You can add this helper class to set section padding-top:80px, padding-bottom:80px.
Add sections-spacing class in div tag. See example below:
<div class="... section-spacing">
    [YOUR CONTENT]
</div>
Note Use this helper class to maintain all page section spacing. You can also use sections-spacing for only padding bottom.
Text color
You can use color in the Text. simply add .parent-color ( or any color you want) class where you want to use. See example below:
You can add/change the site color bootstrap all color service with the one that suits you the best. You can find the color link in top of the
<div class="parent-color">
    [YOUR TEXT CONTENT]
</div>
Note We include 4 color helper class in our template text-danger, text-success, icon and link-color. you can add unlimited color class according to your needs.
Background color
You can use color in the background. simply add .white-bg (or any color you want) class where you want to use. See example below:
You can add/change the site background color bootstrap all background color service with the one that suits you the best. You can find the background color link in top of the
<div class="white-bg">
    [YOUR CONTENT]
</div>
Note We include background color helper class in our template white-bg and grey-bg You can add unlimited background color class according to your needs
Background Images and parallax
You can use an image in the background with parallax effect by simply adding InlineStyle in div tag and by use of this you can create your own background. See example below:
<div class="bg-img-parallax" style="background-image:url(Path); background-repeat:no-repeat;">
    [YOUR CONTENT]
</div>
If your background is small and you want to use repeated background then use styling property background-repeat and set the value repeat or no-repeat. See the example below:
<div class="header-bg-img" style="background-image:url(Path); background-repeat:no-repeat;">
    [YOUR CONTENT]
</div>
If you want to use your background like cover or cointainer. You just need to add styling property background-size and set the value cover or cointainer. see the example below:
<div class="header-bg-img" style="background-image:url(Path); background-size:cover;">
    [YOUR CONTENT]
</div>

Background overlay
You can use these .bg-img-parallax classes to any element in your HTML code to apply overlay color on any image or section. See example below:
<div class="bg-img-parallax" style="background-image:url(Path); background-repeat:no-repeat;">
    [YOUR CONTENT]
</div>
Structure: background-color:(rgba(0,0,0,0.opacity). For Example, .bg-img-parallax:before
Separator
Add this tag in your HTML code to add Separator line. Simply add hr tag where you want to add the line. See example below:
<p> [DIV 1 CONTENT] </p>
</div> <!-- End div 1 -->
  <hr/>
<div> <!-- Start div 2 -->
<p> [DIV 2 CONTENT] </p>
Included Files
HTML Files:
- index.html
- index-2.html
- index-3.html
- index-4.html
- index-5.html
- index-6.html
- index-7.html
- index-8.html
- index-default-sidebar.html
- index-rounded-slides-box.html
- index-sidebar-scrollspy.html
- index-slides-box.html
- blog.html
- blog-grid-sidebar.html
- blog-list.html
- blog-list-sidebar.html
- blog-single.html
- blog-single-sidebar.html
- portfolio.html
- portfolio-4-column.html
- portfolio-single.html
- portfolio-single-sidebar.html
- contact-us.html
- error-404.html
- coming-soon.html
Usage & Customization
General Settings
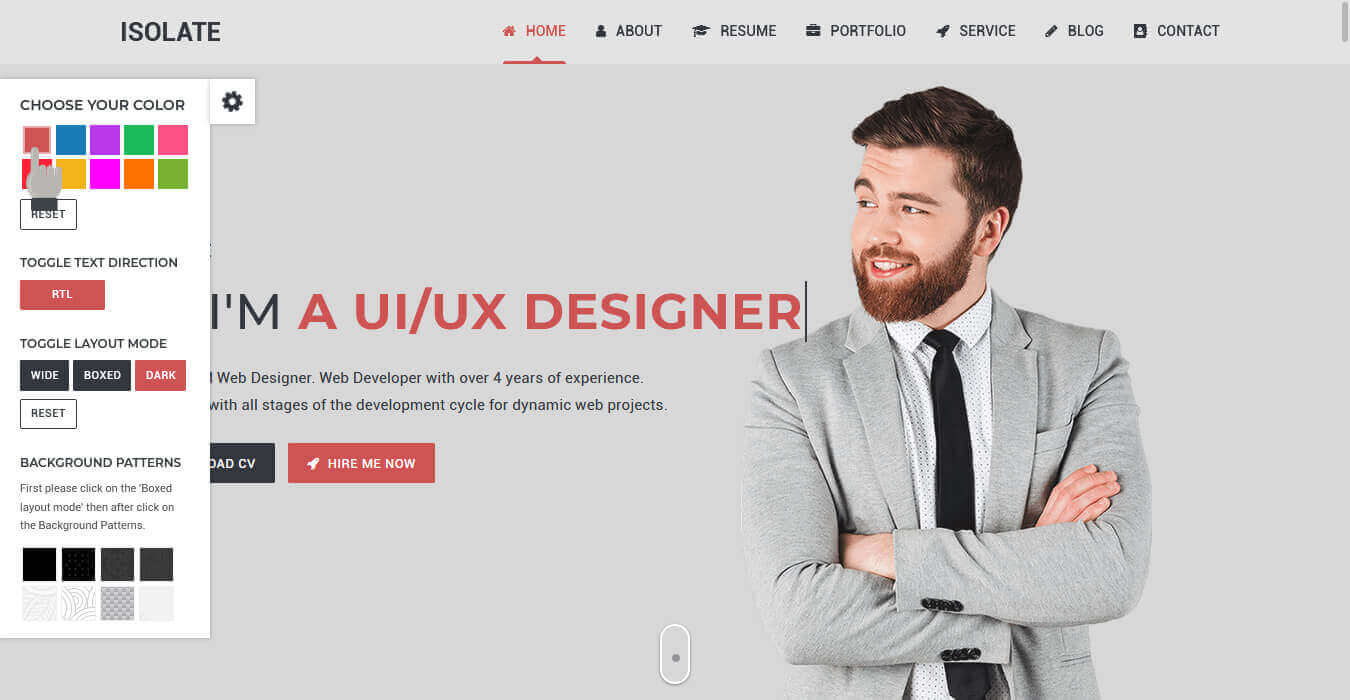
A click on left side setting button that All showing effects Switcher Colors, Right-to-Left and Left-to-Right text direction, Wide Layout, Boxed Layout, Dark and Light Layout and Background Patterns etc...
1. Switcher Colors | Using colors on the website
we need to go through all of the site’s style color with the corresponding custom property.
A click on Reset button is a colors layout selected that can reset a effects.
You can apply your favorite template color here in css. eg: default.css to blue.css
<!-- Template Color -->
<link rel="stylesheet" href="assets/css/colors/default.css" />
Click the color button and see the color style of the page like below:
2. Toggle text direction | Right-to-Left and Left-to-Right
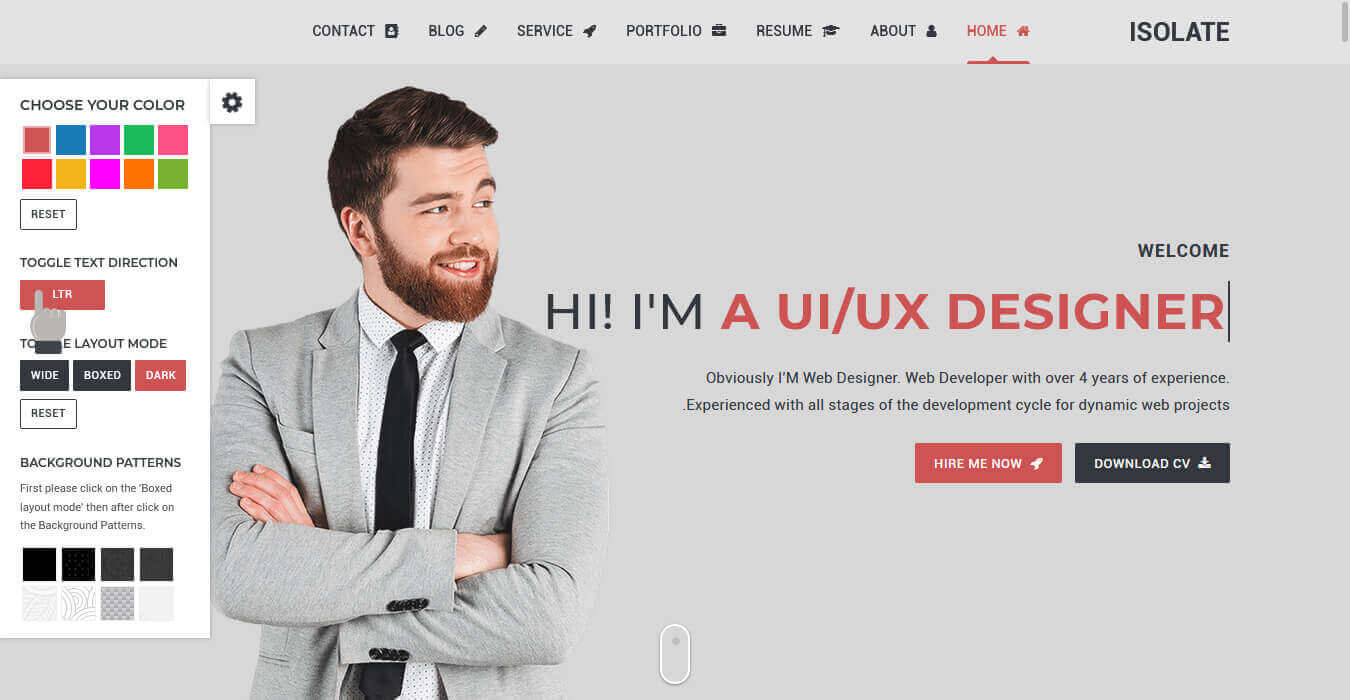
The main difference between left-to-right (LTR) and right-to-left (RTL) language scripts is the direction in which content is displayed: LTR languages display content from left to right. RTL languages display content from right to left.
Now select the text that is showing right-to-left, click the RTL button, and it should switch to left-to-right. Repeat this last step anywhere in your document, the showing text direction frontend from right-to-left.
You can apply your favorite template RTL direction here in html tag.
<html dir="rtl"> </html>
Click on the RTL and LTR button and showing page style like below:
3. Toggle Layout Mode
3.1 Wide Layout
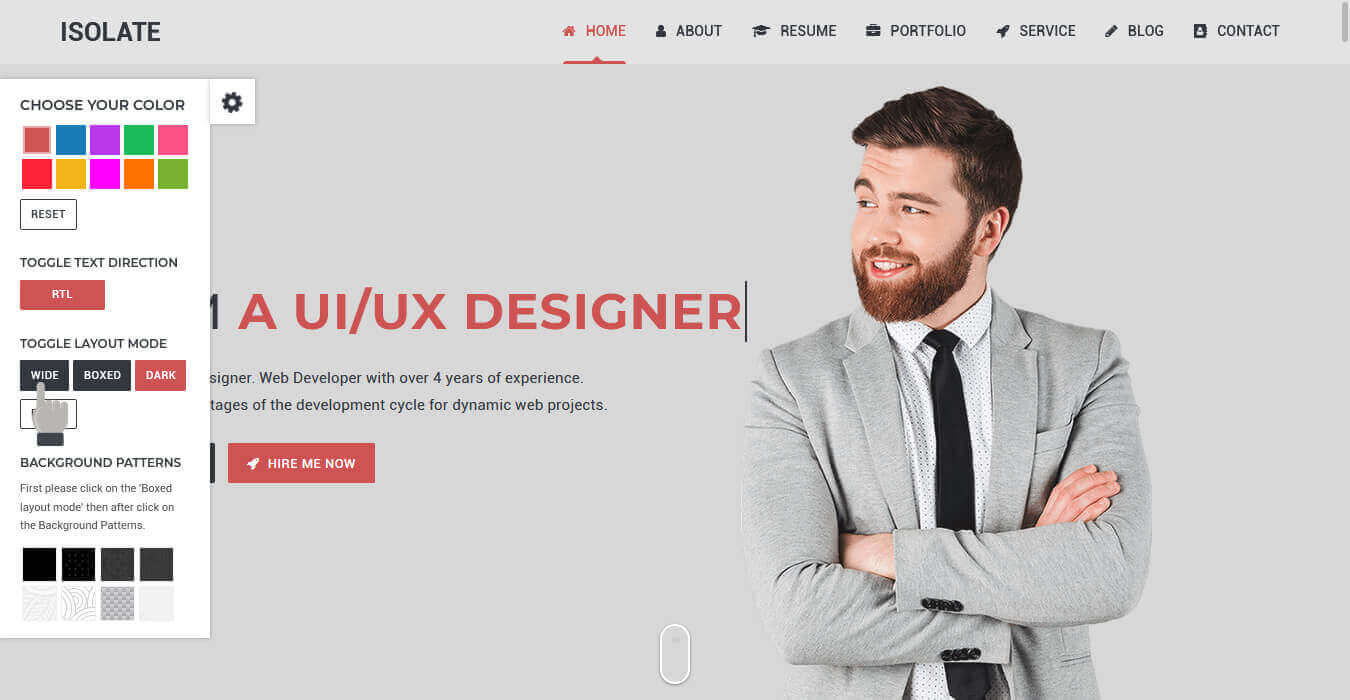
The full width layout takes up the entire space on the page and it usually resizes itself to fit the size of the screen that the viewer is viewing it on.
A click on Reset button is a layout mode selected that can reset the effects.
You can apply your favorite template layout here in body tag.
<body class="index-scrollspy wide-layout"> </body>
Click on the Wide button and showing Full width page style like below:
3.2 Boxed Layout
The Boxed container width layout takes up the entire space on the page and it usually resizes itself to fit the size of the screen that the viewer is viewing it on.
A click on Reset button is a layout mode selected that can reset the effects.
You can apply your favorite template layout here in body tag.
<body class="index-scrollspy boxed-layout"> </body>
Click on the Boxed button and showing container width page style like below:

3.3 Dark and Light Layout
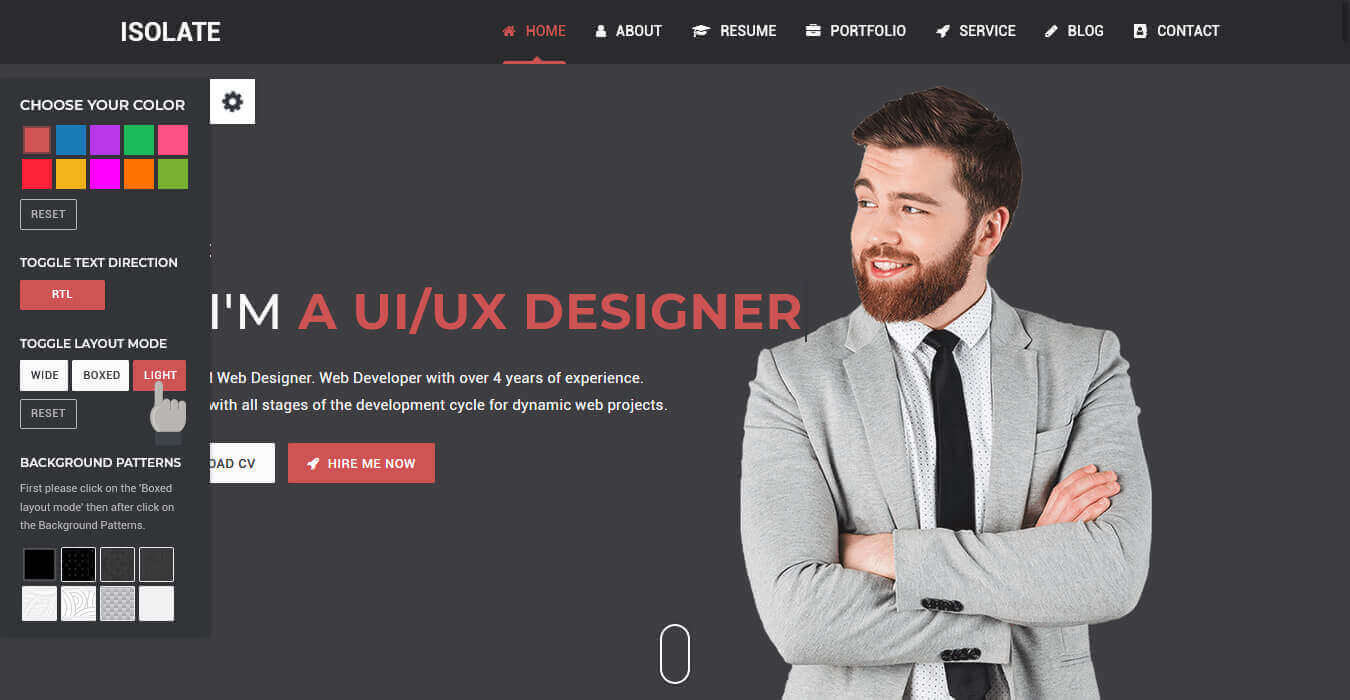
Dark mode in website shows a black background with white or coloured text rather than the usual white background with black text.
A click on Reset button is a layout mode selected that can reset the effects.
You can apply your favorite template layout here in body tag.
<body class="index-scrollspy dark-mode"> </body>
Click on the Dark button and showing Dark and Light page style like below:
4. Background Patterns
First please click on the 'Boxed layout mode' then after click on the Background Patterns.
Background pattern colorful images for layout refers to the way in which we arrange the elements on a page.
You can apply your favorite template Background Patterns here in body tag.
<body class="index-scrollspy" style='background-image:url("assets/images/patterns/1.png");'> </body>
Click on the Pattern button and showing Background Patterns page style like below:

Home Layout
If you want layout style then Adding class in body tag as mentioned below represent:
Default Layout
If you want layout style then Adding class in body tag as mentioned below represent:
<body class="index-scrollspy"> </body>
Boxed Layout
If you want layout style then Adding class in body tag as mentioned below represent:
<body class="index-scrollspy boxed-layout"> </body>
Wide Layout
If you want layout style then Adding class in body tag as mentioned below represent:
<body class="index-scrollspy wide-layout"> </body>
Dark Mode Layout
If you want layout style then Adding class in body tag as mentioned below represent:
<body class="index-scrollspy dark-mode"> </body>
RTL Layout [Right to Left]
If you want layout style then Adding class in html tag as mentioned below represent:
The main difference between left-to-right (LTR) and right-to-left (RTL) language scripts is the direction in which content is displayed: LTR languages display content from left to right. RTL languages display content from right to left, dir="ltr" to dir="rtl".
<html dir="rtl"> </html>
Default Left Sidebar Layout
If you want layout style then Adding class in body tag as mentioned below represent:
<body class="template-index index-default-sidebar"> </body>
Scrollspy Left Sidebar Layout
If you want layout style then Adding class in body tag as mentioned below represent:
<body class="template-index index-scroll-box"> </body>
Rounded Slides Layout
If you want layout style then Adding class in body tag as mentioned below represent:
<body class="template-index index-rounded-slides-box"> </body>
Animated Slides Layout
If you want layout style then Adding class in body tag as mentioned below represent:
<body class="template-index index-slides-box page new-skin"> </body>
General & Fonts Options
1. Fonts Icon
You can add/change the site font icon, from all fonts used from FontAwesome Icon Web Font Services the one that suits you the best.
<!-- FontAwesome Fonts -->
<i class="fa fa-phone" aria-hidden="true">
2. Google Fonts
You can add/change the site font, from all fonts used from Google Web Font Services, with the one that suits you the best. You can find the font link in top of the style.css in all HTML file. See example below:
To include new font you can simply add another link like this:
<-- Google Fonts -->
<!-- Roboto font -->
@import url('//fonts.googleapis.com/css?family=Roboto:100,300,400,500,700,900&display=swap');

<!-- Montserrat font -->
@import url('//fonts.googleapis.com/css2?family=Montserrat:wght@100;200;300;400;500;600;700;800;900&display=swap');
3. Animation
You can also use delays, duration and offset for your animations:
Including Javascript for animation on scroll Animate On Scroll Library And also css for animation adding animated CSS.
<div data-aos="fade-up" data-aos-duration="3000"></div>
Header Style
Transparent Header Style
Adding class from the Header tag .bg-transparent in html file. for your reference index.html

Default Header Style
Adding class from the Header tag .bg-light in html file. for your reference index.html

Dark Header Style
Adding class from the Header tag .bg-light in html file. for your reference index.html

RTL Header Style
Adding class from the Header tag .bg-light in html file. for your reference index.html

Slider Options
OwlCarousel2 of sliders as mentioned below link documentation: OwlCarousel2 documentation.
Banner Slider
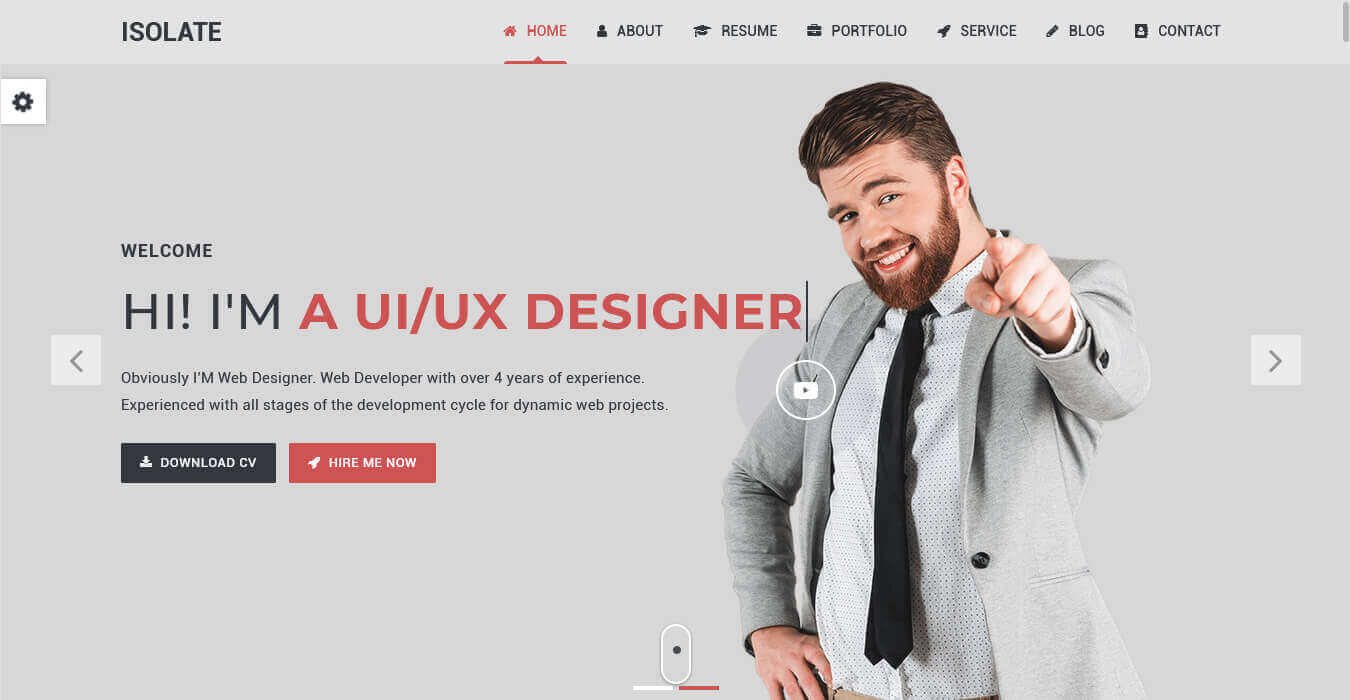
Html code
<!-- Slidershow Banner -->
<ul class="slideshow-slider fadeInOut-slider owl-carousel">
    <li class="slide-one" style="background-image:url('assets/images/banners/image-name.png");"></li>
</ul>
<!-- End Slidershow Banner -->
JS code
<!-- Slideshow fadeInOut Slider -->
function fadeInOut_slider() {
    $(".fadeInOut-slider").owlCarousel({
        loop: true,
        items: 1,
        rewind: true,
        nav: true,
        navText: ['', ''],
        dots: true,
        lazyLoad: true,
        autoplay: true,
        autoplayTimeout: 4000,
        autoplayHoverPause: false,
        animateOut: 'fadeOut',
        animateIn: 'fadeIn'
    });
}
fadeInOut_slider();
Brand Slider
You can find OwlCarousel2 - Brand slider code in index.html page and above is the code for your reference.

Html code
<!-- Clients List -->
<ul class="clients-slider clients owl-carousel">
    <li class="slide-one"><a href="#"><img class="img-fluid" src="assets/images/clients/image-name.jpg" alt="image" /></a></li>
</ul>
<!-- End Clients List -->
JS code
<!-- Clients Slider -->
function cilents_slider() {
    $('.clients-slider').owlCarousel({
        loop: true,
        autoplay: true,
        dots: false,
        nav: true,
        navText: ['', ''],
        responsive: {
            0: {
                items: 2
            },
            600: {
                items: 3
            },
            768: {
                items: 4
            },
            1000: {
                items: 5
            }
        }
    });
}
cilents_slider();
Testimonial Slider
You can find OwlCarousel2 - Testimonial slider code in index.html page and above is the code for your reference.
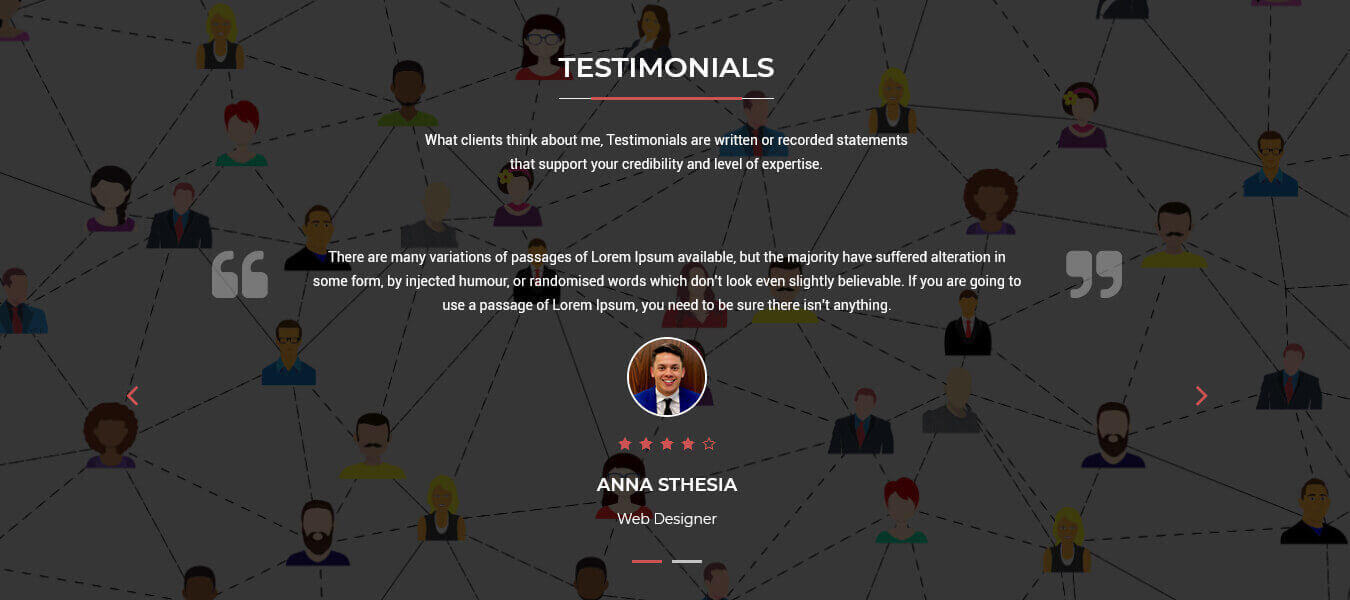
Html code
<!-- Testimonial List -->
<div class="testimonial-carousel owl-carousel">
    <div class="testimonial-item">
        [YOUR CONTENT]
     </div>
</div>
<!-- End Testimonial Banner -->
JS code
<!-- Testimonial Slider -->
function testimonial_slider() {
    $(".testimonial-carousel").owlCarousel({
        loop: true,
        autoplay: false,
        items: 1,
        margin: 30,
        dots: true,
        nav: true,
        navText: ['', '']
    });
}
testimonial_slider();
Slider Post Slider
You can find OwlCarousel2 - One Base slider code in index-sidebar-scrollspy.html page and above is the code for your reference.

Html code
<!-- Slider Post -->
<ul class="one-base-slider owl-carousel">
    <li class="slide-item">
        [YOUR CONTENT]
     </li>
</ul>
<!-- End Slider Post -->
JS code
<!-- One Base Slider -->
function one_base_slider() {
    $(".one-base-slider").owlCarousel({
        loop: true,
        autoplay: true,
        items: 1,
        margin: 30,
        dots: true,
       nav: false
    });
}
one_base_slider();
Youtube Video Background
jQuery mb.YTPlayer of Video as mentioned below link documentation: jQuery mb.YTPlayer documentation.
data-property is an attribute of the TAG where you can pass the options of the player as an Object. Any of the below parameters can also be passed as option within the initialize function. The one defined as attribute of the TAG wins.
The play a Youtube video as background of your page or of an element of your page.
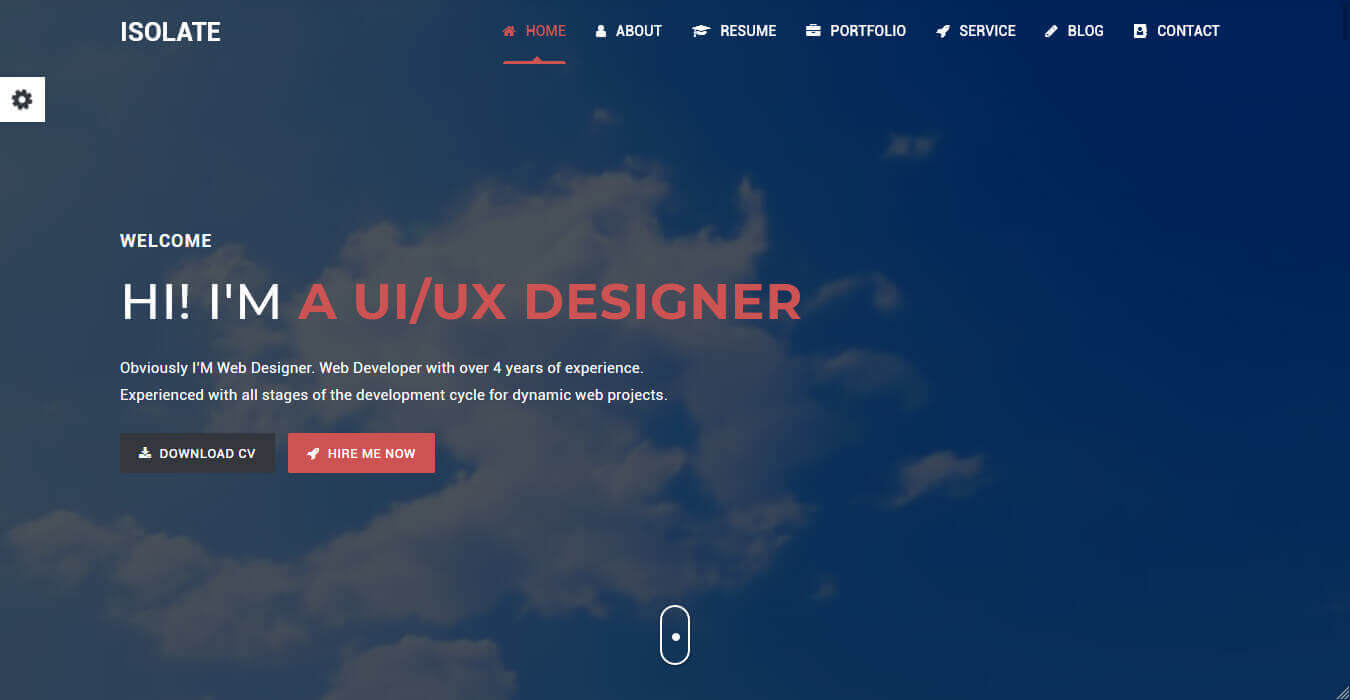
Html code
<!-- Banner Youtube Video -->
<div class="banner-video-inner">
    <div class="mb_YTPlayer" data-property="{videoURL:'Youtube Video URL',containment:'.youtube-banner-video', showControls:false, autoPlay:true, loop:true, mute:true, startAt:0, opacity:1}"></div>
</div>
<!-- End Slidershow Banner -->
CSS / JS Files
<!-- Youtube Video Background CSS -->
<link rel="stylesheet" href="assets/css/jquery.mb.YTPlayer.min.css">

<!-- Youtube Video Background JS -->
<script src="assets/js/jquery.mb.YTPlayer.min.js"></script>

<script>
jQuery(function(){
    jQuery("#[playerID]").YTPlayer();
});
</script>
Particles Background
Particles of Background as mentioned below link documentation: Particles Background.
Particles Background page style like below:

Html code
<!-- Particles.js Container -->
<div id="particles-js"> </div>
<!-- End Particles.js Container -->
JS Files
<!-- Particles Background JS -->
<script src="assets/js/particles-js.js"></script>
Blog Page
You can find blog code in index.html page and above is the code for your reference.
Portfolio Page
You can find Portfolio code in index.html page and above is the code for your reference.
Contact Form
You can find - full screen code in contact-us.html page and above is the code for your reference.
Form validation is included, If a form field (name) is empty, the required attribute prevents this form from being submitted.
Create your store site-key for v2 reCAPTCHA by click Here
Note: Don't forget to change dummy site-key with your site-key to get your HTML contact form with CAPTCHA working
Customer fill up contact form in message box and check in your mail inbox and spam folder.
Replace Your email in \assets\php\mail.php to get your contact us working.
<!-- Email to Admin -->
$to = "yourname@email.com";

$mail->Host = 'yourhostname';
//$mail->Host = $row['server'];

$mail->Username = 'yourusername';
//$mail->Username = $row['username'];
// must be in single quotes
$mail->Password = 'yourpassword';
//$mail->Password = $row['password'];

//email id which will be displayed in the from attribute
$mail->setFrom('yourusername' , 'Contact Us');

Version History (Changelog)
You can find the version history (changelog.txt) file on yourtemplatename.zip folder or you can check changelog on HTML Template sale page.
Once again, thank you so much for purchasing this HTML Template.
Changelog
------------------------
Version 1.0
------------------------
- Initialized release

------------------------
Version 1.1 (April 12, 2022)
------------------------
ADD: Ajax Contact Form

------------------------
Version 2.0 (December 10, 2024)
------------------------
Updated: Font icons (Font awesome v6)
- New Twitter icon is added
- Small issue fixed
Browser Support
Supports all major Browsers like Google Chrome, Mozilla Firefox, Safari, Opera, Internet Explorer and above. Click here
Source & Credits
All images and videos are for preview purposes only and are not included in the download files. Images are of copyrights under Creative Commons CC0.
We would really love to take this opportunity to appreciate guys whose items were helpful to us to make Belle a really beautiful HTML Template for our awesome users:

